The Mite
Part :56
Making a hood emblem.
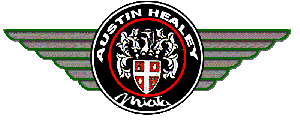
| I did not want to put the Austin Healey emblem on the hood of the Mite, so I quickly designed one in Photoshop that has the Japanese flag atop the British flag, in the center of a circle surrouned by the words "the Mite" I then reversed the image. | |
| This was then printed on transparency film, and placed on a UV sensitive polymer sheet. A UV light is shined through the printed film onto the sheet; and where the light hits, the polymer hardens | |
| The places that were covered by the printed area on the transparency are washed away, and the result is a 3D relief of the image | |
| I trimmed the extra from around the polymer relief, placed it in a mold frame, and then imbedded it in mold rubber. This is an un vulcanized rubber that will surround an imbedded object and then harden when subjected to heat and pressure | |
| Once the mold is packed, it is placed in the press where it is heated and pressed until the rubber vulcanizes. | |
| Once the mold has cooled, it is cut away from the original, leaving a cavity exaclty like the original. In this case, the polymer tends to crack and peel away from its metal backing, but it does not matter at this point. | |
| This is a vacuum wax injector. The mold from above is placed in the clamp and then it is automagically pushed to the nozzle of the machine. The wax injector first pulls a vacuum in the mold, evacuating all air from the cavity. Then, hot molten wax is injected into the mold | |
| In a few minutes, the wax has solidified and the mold can be split, releasing a wax duplicate of the polymer pattern | |
| I put two of the waxes onto a 'tree' made of wax | |
then the tree is placed in an inconel flask (piece of tubing) and filled with investment , a fancy name for a special plaster. I don't have a picture of the investment filled flask, but just imagine this filled with plaster. |
|
| Then, once the investment has hardened, the flasks are placed in this kiln and the wax is melted out. They are brought up to about 1300F to burn out any remains of the wax, and then cooled a bit to casting temperatures. At this point, we have a hollow in the investment that is exaclty the shape of the metal object we want to cast | |
| The flasks are taken from the kiln and placed in the casting machine. Here, a vacuum is drawn over the metal and flask and then an induction field melts the metal. Once the metal is molten, the machine spins the flask and the molten metal, forcing the metal into the cavity in the investment | |
| When the flask is cool, the investment is broken away and our metal pieces are ready for finishing | |
| I soldered a post onto the back for the retaining clips | |
| And then filled the recessed areas with Ceramit, a low temperature epoxy-type enamel | |
| Here's the Mite badge next to the Austin Healey badge. | |
| Here's the badge on the car. I drilled an 1/8" hole, lined the back of the badge with 3M double adhesive, pushed the post through the hole and used a clip on the inside to hold it in place | |
| 'nother view | |
| And - I just had to have this. Picked it up Saturday and right now I have the seats out getting re-done in black, the carpet's gone, the wheels are off waiting for the 4 wheel disc brake conversion, a 3" body lift is in the works, and I've begun fabbing a 6 point roll cage. Hopefully I'll have this little gem done in a couple of weeks. |